Introduction
My grandmother never owned a tube of toothpaste in her life. She used a small stick — cut fresh every morning from a tree in the yard — and her teeth were, honestly, embarrassingly white for someone her age. I didn’t really think much of it growing up. It just seemed like an “old people thing.” Then, a few years ago, I started reading about miswak and realized there was actual dental science behind what she’d been doing all along.
So if you’ve been hearing about miswak sticks lately and wondering whether they actually work for teeth whitening — or more importantly, wondering how to use miswak properly so you don’t waste your money on sticks that just sit in a drawer — this article is for you.
I’m going to walk you through everything. What’s in it, how it whitens teeth, the exact technique most people get wrong, and what you can realistically expect after a few weeks of using it.
First, What Even Is a Miswak Stick?
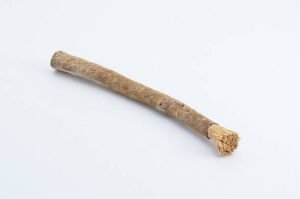
Miswak (you’ll also see it written as “siwak,” “sewak,” or “meswak”) is a teeth-cleaning twig made from the Salvadora persica tree — commonly called the Arak tree. It grows across parts of the Middle East, Africa, and South Asia, which is exactly where this tradition has been strongest for centuries.
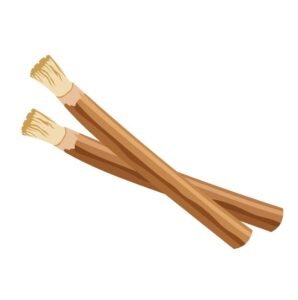
The stick itself looks unimpressive. It’s a brownish twig, maybe the thickness of a finger, with a slightly bitter taste when you first chew it. Not glamorous at all.
But inside that twig is a surprisingly rich mix of compounds that have genuine dental benefits. Silica — which acts as a natural abrasive to scrub off stains. Salvadorine and trimethylamine, which are antibacterial and actively fight the bacteria that cause plaque. Natural fluoride, which strengthens enamel. Tannins, which tighten gum tissue. Vitamin C for gum health. Even resins that leave a thin protective film on your teeth after use.
This isn’t folk medicine or folklore. The World Health Organization officially recognized miswak as an effective oral hygiene tool and called for more research into its preventive dental applications. Peer-reviewed studies — including research published in periodontal journals — have consistently found that miswak used with proper technique is at least as effective as a conventional toothbrush for plaque removal and gingivitis control.
At the same time, let’s be honest about what it does and doesn’t do. Miswak tackles surface stains — the kind that build up from tea, coffee, tobacco, and food. It cannot change the internal color of your teeth. If your discoloration is genetic or caused by old dental work or antibiotics, no natural remedy is going to fix that. But if your teeth have yellowed from daily chai and your morning cup of coffee, this is exactly the kind of staining miswak is good at addressing over time.
How to Use Miswak the Right Way — Step by Step
Most people who try miswak and give up within a week aren’t doing anything wrong with their commitment. They’re doing something wrong with their technique. Here’s how to actually use it correctly.
Getting the Right Stick
Before you even start brushing, the stick itself matters a lot.
Fresh miswak is flexible — it bends a little without snapping. If you buy a miswak stick and it feels dry and rigid, it’s already past its prime. A stale stick has weaker antibacterial activity and will be harsher on your gums because the fibers don’t soften properly. Look for sticks that are moist to the touch, have a slight give when you press them, and still carry that characteristic bitter-earthy smell.
Diameter matters too. You want something roughly as wide as your thumb — thin sticks are harder to grip and don’t produce enough bristle surface to clean effectively.
If you’re storing it at home, keep it somewhere cool and dry. Wrapping it in a slightly damp cloth and storing it in the fridge extends freshness by several days. Never seal it in an airtight bag while it’s wet — that’s how mold grows.
Preparing the Bristle End
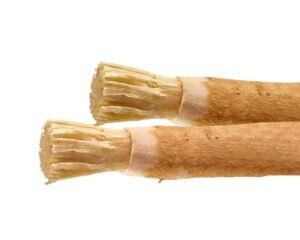
This step is where most first-timers go wrong. You can’t just chew the end randomly and call it bristles.
Start by peeling back the outer bark on one end of the stick — about one centimeter, which is roughly the width of your thumbnail. Use your fingernail or a small knife for a clean peel. Don’t skip this; the bark itself is too tough and won’t soften into usable bristles.
Once the bark is peeled, place that end between your molars and chew it gently. Not aggressively — gently, like you’re softening it. Keep doing this for a minute or two, rotating the stick slightly as you go. What you’re looking for is the woody fibers to separate and fan out into a soft, brush-like fringe. When you press those fibers against the back of your hand, they should feel soft, not scratchy.
If the bristles still feel stiff after chewing, soak the peeled tip in water for about 20 to 30 minutes and try again. Some sticks need this, especially if they’ve been drying out a bit during shipping.
Trim the used end every two to three days and prepare a fresh portion of the stick. One stick can last a couple of weeks this way.
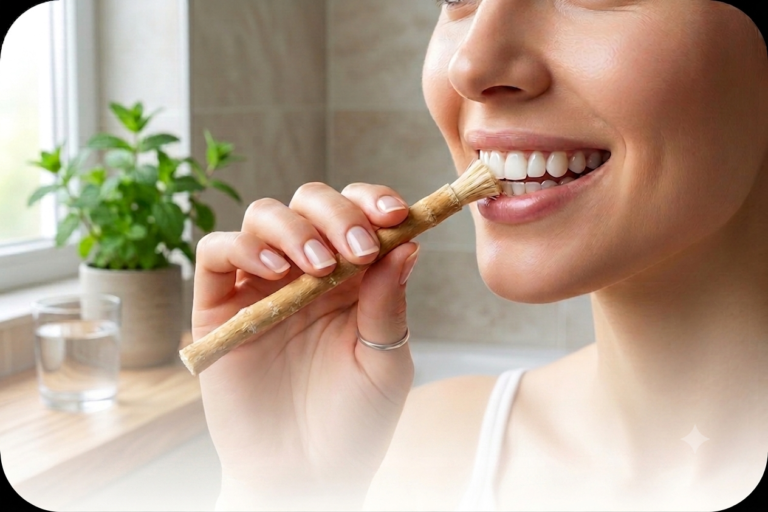
The Actual Brushing Technique
Hold the stick like you’d hold a pencil — thumb underneath, index and middle fingers on top. This grip gives you control and naturally limits how much pressure you apply. That’s important, because one of the most common mistakes people make is pressing too hard, which irritates gums and can scratch enamel over time.
Front teeth: Hold the stick horizontally, bristle end against the outer surface of your upper front teeth, and use short back-and-forth strokes. Think small movements, not big sweeping motions. Do the lower front teeth the same way.
Back teeth: Rotate the stick so you’re working it more vertically, and work your way back along both the outer and inner surfaces of your molars. The inner surfaces (the tongue-facing sides) are where most people skip and, coincidentally, where plaque tends to build up most. Don’t rush through the back.
Along the gumline: Angle the bristled tip at about 45 degrees toward your gums and use very gentle circular strokes right at the gum margin. This is the most important zone for gum health and the most common place people develop early gum disease. Take your time here.
Inner front tooth surfaces: Tilt the stick vertically and use short up-and-down strokes on the back surfaces of your upper and lower front teeth.
Your tongue: The flat side of the stick works reasonably well as a tongue scraper. A few gentle passes reduce the bacteria that cause bad breath noticeably.
Spend at least two full minutes. I know that sounds obvious, but it’s easy to rush through this, especially in the beginning when you’re still figuring out the mechanics.
How Often and When
Use miswak two to three times a day — morning, after lunch if possible, and before bed. The before-bed session is the most important one for whitening specifically. Saliva production drops significantly at night, so the natural compounds from miswak stay on your teeth longer rather than being washed away. Think of it like leaving a treatment on versus rinsing it off immediately.
After use, rinse your mouth with water. Rinse the tip under the tap, shake off the excess water, and leave it somewhere it can air dry. Don’t leave it lying face-down on a wet surface.
What’s Actually Happening When Miswak Whitens Your Teeth
The whitening effect from miswak stick teeth whitening isn’t one single thing working — it’s a few things happening together.
The silica crystals in the wood fibers gently polish the outer surface of tooth enamel as you brush. This removes the thin film of stain particles that attach to teeth from colored foods and drinks. It’s a mild abrasive action — similar in concept to whitening toothpastes, but because it’s naturally occurring and the fibers are soft, it doesn’t strip enamel the way harsh commercial abrasives can.
At the same time, the antibacterial compounds in miswak — particularly salvadorine — reduce the populations of bacteria in your mouth. Plaque is a bacterial biofilm, and when you reduce that biofilm consistently, you’re also reducing the sticky surface that new stain particles cling to. Less plaque means less future staining.
The tannins add another layer. They have a mild astringent effect on gum tissue, reducing inflammation and helping gums sit tighter against teeth. Healthy-looking gums actually make teeth appear whiter just by contrast — inflamed, reddish gums make even clean teeth look worse.
All of this adds up gradually. Don’t expect to see anything dramatic in the first week. By week two you’ll likely notice your teeth feel cleaner and your breath is fresher. Visible brightening of surface stains typically starts becoming obvious somewhere between weeks three and six, depending on how stained your teeth were to begin with and how consistently you’re using it.
Mistakes That Kill Your Results
Pressing too hard. Seriously, this is the number one problem. Miswak bristles are soft — they’re meant to be soft. Grinding them into your teeth and gums doesn’t clean better, it just causes irritation and eventually recession. Feather-light pressure is all you need.
Using a dry, stiff stick. A stick that hasn’t been properly hydrated or freshened can feel like sandpaper. It also loses a significant amount of its antibacterial potency as it dries out. If your stick bends and snaps rather than flexes, throw it out and get a fresh one.
Only brushing outer surfaces. Your inner tooth surfaces and gumline don’t care whether they’re visible in the mirror or not. They accumulate plaque just the same. Full coverage is non-negotiable.
Giving up too early. Two weeks of miswak and expecting dramatic whitening is unrealistic. This is a natural product that works progressively. The people who see real results are the ones who stick with it consistently for four to eight weeks.
Treating it as a complete replacement for all dental care. Miswak is genuinely effective, but flossing is still something it can’t fully replicate, and a dentist can catch things no amount of natural cleaning will prevent. Use miswak as a powerful addition to your routine, not as a reason to skip everything else.
Miswak vs. Your Regular Toothbrush — Where Does It Actually Win?
Plaque removal? Research shows miswak is comparable to a toothbrush. Not dramatically better, not worse — comparable, which is honestly impressive for a stick from a tree.
Where miswak genuinely wins:
No water needed. You can use it literally anywhere — on a flight, at your desk, camping. This is actually a significant practical advantage that gets underrated.
Zero plastic. Entirely biodegradable. No packaging waste, no plastic handle ending up in a landfill.
Built-in antibacterial action. Regular toothbrushes don’t inherently have antibacterial compounds. Miswak does. That matters for people prone to gum issues.
Cost. A bundle of miswak sticks costs very little compared to running through toothbrushes and toothpaste regularly.
Where a conventional toothbrush wins:
Fluoride concentration. The fluoride in miswak is natural and present in small amounts. Fluoride toothpaste delivers higher, more consistent concentrations that are especially important for people in areas without fluoridated water.
Ease of use. There’s a learning curve with miswak that a toothbrush simply doesn’t have. For kids especially, a toothbrush is more practical.
Deep staining. For intrinsic discoloration or severe staining, miswak has its limits. That’s what professional whitening treatments exist for.
The honest answer is that they complement each other well. Many people use miswak two or three times through the day and do one proper fluoride toothpaste brush before bed. Others go full miswak and do fine. It depends on your specific dental situation.
A Few Common Questions Worth Answering
Will miswak damage my enamel? With light pressure and proper technique, no. The silica in miswak is a much gentler abrasive than many commercial whitening toothpastes. The key word is light pressure. Scrubbing hard with anything damages enamel.
Is miswak safe to use during pregnancy? There’s no specific evidence of harm, but as with any change to your health routine during pregnancy, it’s worth a quick mention to your doctor or dentist. Better safe than sorry.
I have a dental crown or veneers — can I use miswak? The mild abrasive action is generally fine for natural teeth but could over time affect the surface of some dental restorations. If you have significant cosmetic dental work, ask your dentist before making miswak a daily habit.
How long does one stick last? With proper trimming and care — cutting fresh bristles every couple of days — a single stick can last two to three weeks easily.
Is it safe for children? Older kids from around 8 or 9 upward can usually handle it with some practice. For younger children, the technique requires more control than they typically have, so it’s worth discussing with a pediatric dentist first.
A Final Thought
There’s something quietly satisfying about using something that has been used by people for over a thousand years and having it actually work. Miswak isn’t trending because of clever marketing. It’s getting attention because people are trying it, being consistent with it, and noticing real differences in how their teeth look and feel.
The technique takes maybe a week to feel comfortable. The whitening results take a few more weeks of patience. But if you’re looking for a genuinely natural way to improve your oral health — one backed by actual research and not just Instagram wellness culture — miswak is worth your honest, committed effort.
Your grandmother (or someone’s grandmother) was onto something real. Turns out old habits die hard for a reason.